
LUXE LESSONS #2: How to Create the Perfect Gallery Wall

HOW TO CREATE THE PERFECT GALLERY WALL
A gallery wall is a timeless way to give a meaningful purpose to any wall or corner. While it may seem like a daunting task to create the dream gallery, it is rather simple if you follow a few basic steps. And we’re here to break it down for you!
STEP 1: GOOD VIBES ONLY
What’s the vibe you want to create? Modern, formal, or eclectic? Defining this is the most important step, as it's your creativity roadmap along the way. Step out of your comfort zone and you’ll be amazed at what you can create. Don’t be afraid to mix art mediums or frame finishes to add an eclectic and unexpected pop to any gallery. For a more modern approach, black and white photography paired with color prints works beautifully. Looking for drama? Consider oversized, matted frames with black and white prints. We love using family prints in varying sizes and frame finishes for a trip down memory lane.

Remember, frame styles can become an interesting feature in the design. A gallery done in simple modern frames evokes different emotions and interest than one done with ornate styles. And don’t forget, an element as simple as the frame matting can transform the mood of any gallery. Be sure to take a step back throughout the process to make sure that your design is done with intention.
STEP 2: SCALE BACK
Your eye can easily tell when something looks out of place, and this is especially true when it comes to your gallery wall. Nothing is worse than having a beautiful oversized sofa with a teeny-tiny gallery above it. Create a high-end look by scaling your frames and layout to the size of the room, the furniture in it, and to the frames itself.

STEP 3: PLAN THE JOURNEY
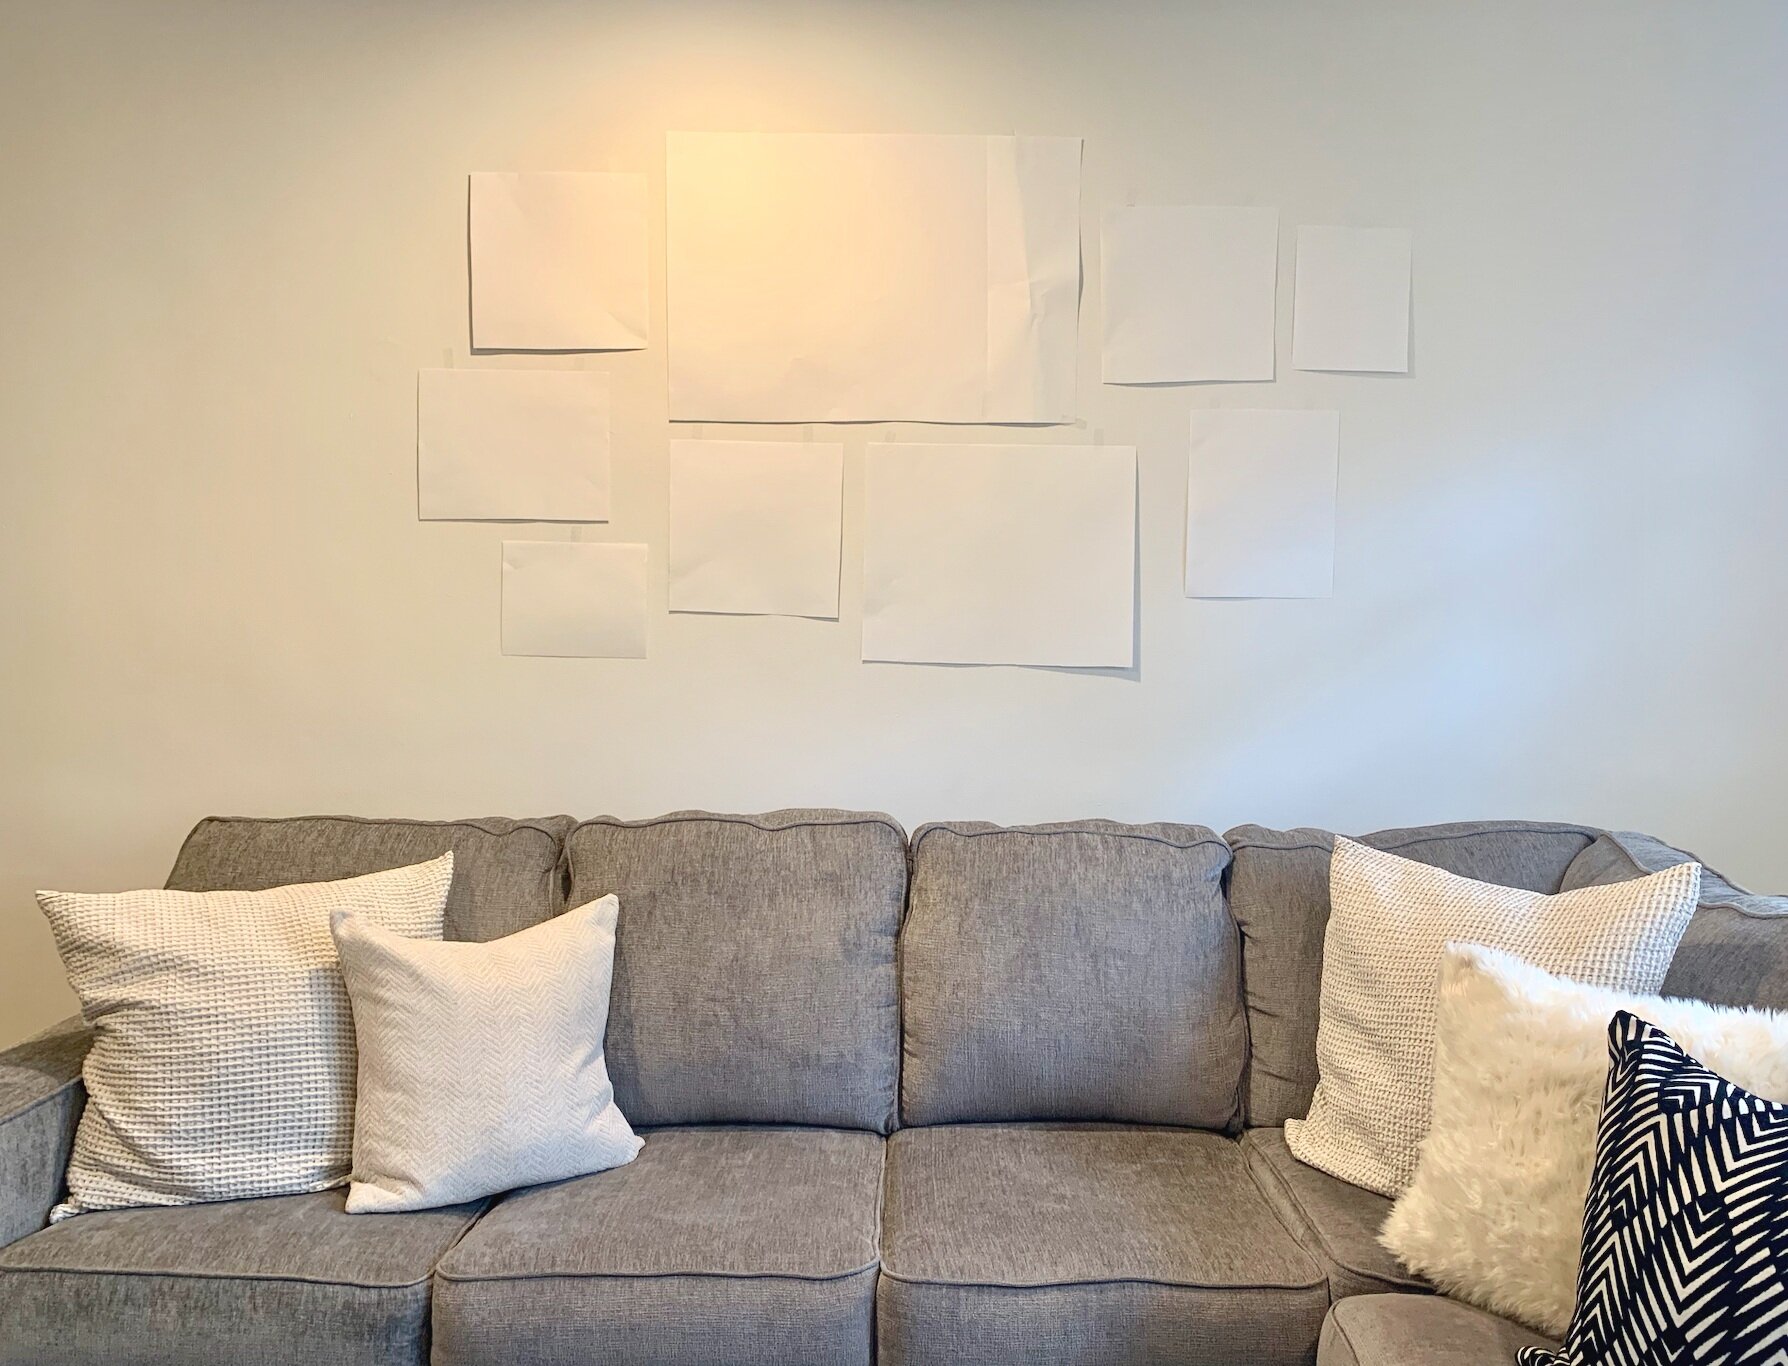
Just like any other great design project, a little bit of planning goes a long way. A plan from the get-go is the best way to stay focused and on track when creating your unique gallery wall. Start with a sketch. Don’t worry! You don’t need to be an artist to do this. A simple sketch outlining the parameters of the gallery and frames will do. From there start to think about the sizes of the frames you’d like to incorporate. Once you have completed your sketch, you can easily shop for your frames by labeling each sketch with your ideal size and finish. Be sure to template the space with paper and sticky tack so that you can easily rearrange as necessary before any nails go into the wall. We recommend placing frames about 1.5 to 2 inches apart.

STEP 4: HANGIN’ TOUGH
Raise your hand if you’ve made it through the planning stages of a gallery wall and then put off completing it because you were too nervous to hang the frames yourself? You’re not alone! But, with a few simple tips you can start hanging in no time!
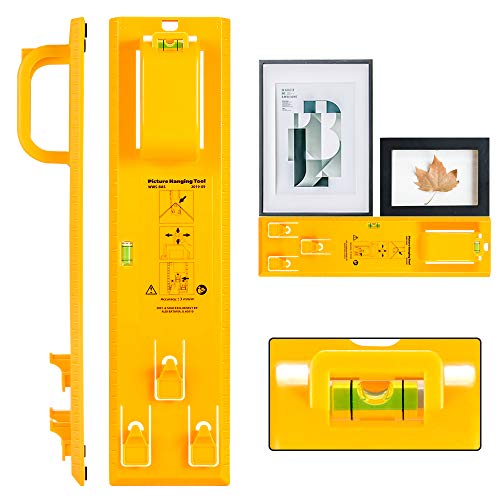
A level is your best friend! Make sure it’s scaled properly to the frames you are using. Use sturdy screws with mollies and know the material of your wall. Some walls may require drilling. We like to start with the frame in the center and work our way out, that way we can make any small adjustments as we go. Designer Tip: Most frame hooks aren’t placed in the center, so measure exactly where the screws need to go. After the frames are hung, use command strips on the bottom to keep the frame straight. If measuring and numbers aren’t your thing, opt in for a picture hanging tool like the one linked below. This is also perfect for hanging pictures with wires.
Now you have all the tools you need to create your perfect gallery wall! There are so many places within your home to bring in this high-end designer element. Oftentimes the most overlooked spaces are the perfect venue for a gallery wall. Some of our favorite spots are a mud room, breakfast nook, staircase, walk-in closet, or an entryway. Still nervous about DIY? Enlist the help of a designer; contact us today at concierge@luxedesignny.com.